Things have been pretty busy down at the Beez Neez. We have been taking lots of orders for package bees, assembling equipment, and trying to be ready for the annual craziness of package bees. I have two different friends who are each loopy enough to want to drive down to California with me to pick up the package bees. The impending package bee week is forcing me to clean up my act at the store and get at least part of the store organized and ready for the bees.
I really miss Quentin, a former employee who moved back to Wyoming this past year. Quentin is really good at organizing stuff, not so much my strong suit. However, I don't begrudge him moving back home to take care of his aging parents. I have replaced him with a total of four part time employees; two adults who are seasonal, and two teenagers who are also seasonal but weren't intended to be. The two adults, David and Mike, are both very knowledgeable about bees so that has made my life much easier. One of the boys hurt his leg playing basketball and just had surgery two weeks ago on April Fools Day. I have lost his services for about a month. The other boy is doing track so is also temporarily not available. I hope to have both of the young men back before the start of summer. I will lose at least one of the part time adults some time in May.
We have a new shirt on order for the package bees. It's patterned after a T-shirt my daughter had silk screened for me. It has a drawing of a queen bee on the front with the inscription, "All hail the Queen". I'm doing this one strictly as a girl's shirt in pink or gray. I'm hoping it to sell well. I will add a photo of the shirt as soon as they arrive.
I've also been busy getting my own hives in order. I have been going through my deadouts, replacing old brood comb and repainting boxes, bottom boards, and lids while they are not occupied by bees.
I was fortunate enough to have a day off on a warm day two weeks ago in which I was able to go through my surviving bee hives. One hive had just five frames of bees, but had four frames of capped brood. It was a one deep hive so it was a ticking time bomb as far as population explosions go. The four frames of capped brood translate to about 12 frames of newly emerged bees over the next 12 days. I knew they needed a second box within the next week or so. Six days passed before I hit another day off warm enough for me to open the hive. In just six days they had gone from five frames of bees to almost ten frames of bees. I was able to add the second box in the nick of time. It is amazing how fast a beehive's population can grow in the spring. I could have merely slapped a second box on a week ago, but I wanted to prep the frames first and I wanted to redo some of the frames in the lower deep box. I use plastic foundation and the bees do a much better job drawing out the comb if a little extra beeswax is added to the frames. Without the extra wax, sometimes they draw the comb out a little funny. The frames I needed to replace were ones that hadn't been properly prepped.
Monday, April 13, 2015

Saturday, February 07, 2015
Assembly and Beeswax
We've started to get into serious assembly mode at the Beez Neez. We're building lots of boxes and frames to try to meet the coming demand, I've also still got one little beeswax project going. We pour filtered beeswax into little 1 1/2 ounce molds for a company that makes immersion suits. I actually had an immersion suit in my seat pack when I flew on recon flights when I served in the Air Force. We called them "poopy suits". The idea was that if you had to ditch the plane into the water, the immersion suit would help you remain conscience longer in the frigid water to increase the possibility of rescue. Considering the fact that we flew over polar ice pack and the Bering Sea that increased our chances of survival from none to very slim. Still it was nice that the Air force would invest the money to give us even a slightly improved chance of survival. Similar immersion suits are mandatory equipment on fishing boats and commercial shipping. The small beeswax bars are used to lubricate and waterproof the zippers on the immersion suits as well as on dry suits used by divers.
We actually made a set of molds with the logo of the company making the immersion suits. I've made thousands of these little beeswax bars for this company over the past three or four years. I'm working on building up an inventory of the little beeswax bars now while I still have a little time. Otherwise they' ll decide to order some more beeswax bars while we are right in the middle of the package bee craziness. This company's immersion suits literally travel all over the globe and our little beeswax bars go right along with them. That makes me feel somewhat connected to the global economy. Beeswax produced and rendered in Western Washington ends up on ice breakers and crab boats in Alaska and on large container ships traveling the seven seas.
We actually made a set of molds with the logo of the company making the immersion suits. I've made thousands of these little beeswax bars for this company over the past three or four years. I'm working on building up an inventory of the little beeswax bars now while I still have a little time. Otherwise they' ll decide to order some more beeswax bars while we are right in the middle of the package bee craziness. This company's immersion suits literally travel all over the globe and our little beeswax bars go right along with them. That makes me feel somewhat connected to the global economy. Beeswax produced and rendered in Western Washington ends up on ice breakers and crab boats in Alaska and on large container ships traveling the seven seas.
Monday, December 15, 2014
Making a Fondant Feeder
Beekeeping is a little different in the maritime Northwest. It's a tough place to overwinter bees, not so much because of the cold, but mainly due to our wet winters and springs. Often people ask me in October and November when they should feed their bees. I tell them they should have feed them about two months ago. In our damp maritime climate it really isn't a good idea to feed sugar syrup that late into the fall. The bees aren't able to reduce the moisture content and the syrup can ferment in the comb, causing dysentery. Ideally a Western Washington beekeeper completes fall syrup feedings by mid September. Fortunately there is still something procrastinating beekeepers can do to supplement their hives' winter stores even in October or November. It may be too late to feed sugar syrup, but they can still make a fondant feeder.
A fondant feeder can be made by simply attaching a surplus wood bound queen excluder to a shallow or western (medium) honey super. (I consider all of my queen excluders to be surplus as I stopped using them about five years ago, but I will save that topic for another day.) I learned about this type of fondant feeder from a friend who had read about it in some Ohio beekeeper's blog. He was very pleased with the results. It not only provided extra food for the bees, but also kept the hive drier, a major plus in our damp climate.
I used 1 1/2 inch narrow crown staples to permanently attach the queen excluders to the super. I then painted the fondant feeder just like I paint all of my equipment. I don't just paint the outside surfaces, but also the surfaces where wood will touch wood at the top and bottom of the boxes. Those areas will wick water in our damp winters if they are left unpainted, making it difficult for the bees to keep their hive dry. Of course my favorite colors to paint bee equipment are any gallons of exterior latex paint I find in the mistint bin at the local hardware store. Since we don't have blistering hot summers in the maritime Northwest we don't have to paint our beehives white.
Once the feeder is assembled and painted it is ready to be loaded up with sugar. I mix up granulated sugar with one cup of water for every five pounds of sugar. Before I put the damp sugar into the feeder, I cover the metal bars of the queen excluder with sheets of copy paper. The purpose of the paper is to keep the moist sugar from falling through the metal bars until it has had time to set up. I cut a 1 1/2 inch diameter hole in one of the sheets of paper and then cover the hole with the small end of a paper cup. The damp sugar is then added. It sets up over night and becomes one large sugar cube by the next morning. The paper cup is then removed and the fondant feeder is ready for use. I generally put about 10 or 15 pounds of sugar in the feeder.
Fondant feeders serve a dual purpose in our climate. Whenever the weather is warm enough for the bees to be active inside the hive, they will happily mine the sugar as a source of food. However, the fondant feeder also serves as a moisture sink. Just like honey, sugar readily absorbs moisture from the atmosphere. Much of the moisture that would normally condense inside the hive is instead absorbed by the sugar block, keeping the hive much drier.
A fondant feeder can be made by simply attaching a surplus wood bound queen excluder to a shallow or western (medium) honey super. (I consider all of my queen excluders to be surplus as I stopped using them about five years ago, but I will save that topic for another day.) I learned about this type of fondant feeder from a friend who had read about it in some Ohio beekeeper's blog. He was very pleased with the results. It not only provided extra food for the bees, but also kept the hive drier, a major plus in our damp climate.
 |
| Queen excluder stapled to western super |
I used 1 1/2 inch narrow crown staples to permanently attach the queen excluders to the super. I then painted the fondant feeder just like I paint all of my equipment. I don't just paint the outside surfaces, but also the surfaces where wood will touch wood at the top and bottom of the boxes. Those areas will wick water in our damp winters if they are left unpainted, making it difficult for the bees to keep their hive dry. Of course my favorite colors to paint bee equipment are any gallons of exterior latex paint I find in the mistint bin at the local hardware store. Since we don't have blistering hot summers in the maritime Northwest we don't have to paint our beehives white.
 |
| Sugar has been added to the lower of these two fondant feeders |
 |
| I buy 50 pound bags of sugar at our local Cash and Carry |
 |
| Finished fondant feeder with the paper cup removed |
Fondant feeders serve a dual purpose in our climate. Whenever the weather is warm enough for the bees to be active inside the hive, they will happily mine the sugar as a source of food. However, the fondant feeder also serves as a moisture sink. Just like honey, sugar readily absorbs moisture from the atmosphere. Much of the moisture that would normally condense inside the hive is instead absorbed by the sugar block, keeping the hive much drier.
Monday, December 08, 2014
Observation Hive, December 6, 2014
The observation hive has continued to dwindle over the past month with no obvious reason for the loss in population. It went from having more than three full frames covered with bees to less than half of a frame. I'm suspicious that the cause may be the warmth of the store. I keep the store at about 70 degrees. Possibly the bees are flying out when it is much to cold and are failing to make it back to the hive. Most of the population loss occurred when we had a week or more of cold weather before Thanksgiving.
I was so hopeful the bees would do better wintering in the observation hive this time. You would think a warm and dry location with an unlimited food supply would be just the ticket. Maybe this is just like children. It is not helpful when you do too much for them. I feel like I need to make a black velvet cover I can drape over the whole observation hive after the last bee is dead. It is an Italian funeral custom to hang black drapes over the door for a period of time following a death. I observed this many years ago while serving as a LDS missionary in Northern Italy. This particular hive of bees were part Italian after all.
On a happier note, I finally finished the big beeswax rendering project on Saturday, December 6th. My good friend Quentin started this project while I was on vacation in late October. Together we processed a grand total of six 55 gallon drums of cappings which resulted in 1,060 pounds of unfiltered beeswax. All of this was done with my little Walter Kelly Cappings Melter. Now I just need to melt the whole lot into one pound bricks so it will be in a convenient form to sell. We definitely won't run out of beeswax this year.
 |
| On October 16 there are 3 full frames of bees |
 |
| After Thanksgiving the bees have dwindled down to less than one full frame |
 |
| Queen Nora the First on December 6th with her few remaining minions |
 |
| 1,060 pounds of unfiltered beeswax |
On a happier note, I finally finished the big beeswax rendering project on Saturday, December 6th. My good friend Quentin started this project while I was on vacation in late October. Together we processed a grand total of six 55 gallon drums of cappings which resulted in 1,060 pounds of unfiltered beeswax. All of this was done with my little Walter Kelly Cappings Melter. Now I just need to melt the whole lot into one pound bricks so it will be in a convenient form to sell. We definitely won't run out of beeswax this year.
Sunday, November 23, 2014
Thursday Night Candle Classes at the Beez Neez
We had our first candle class of the season on November 13th. I have a number of motivations for the candle classes. First of all, its a slow time of year and it brings in a little more business. Secondly, I have to make candles anyhow because we sell a lot of them near Christmas. However, the main reason I do candle classes is that I just love making beeswax candles. I have never gotten tired of making candles and playing with beeswax. I look forward to this time of year when things slow down and I have time to make candles again.
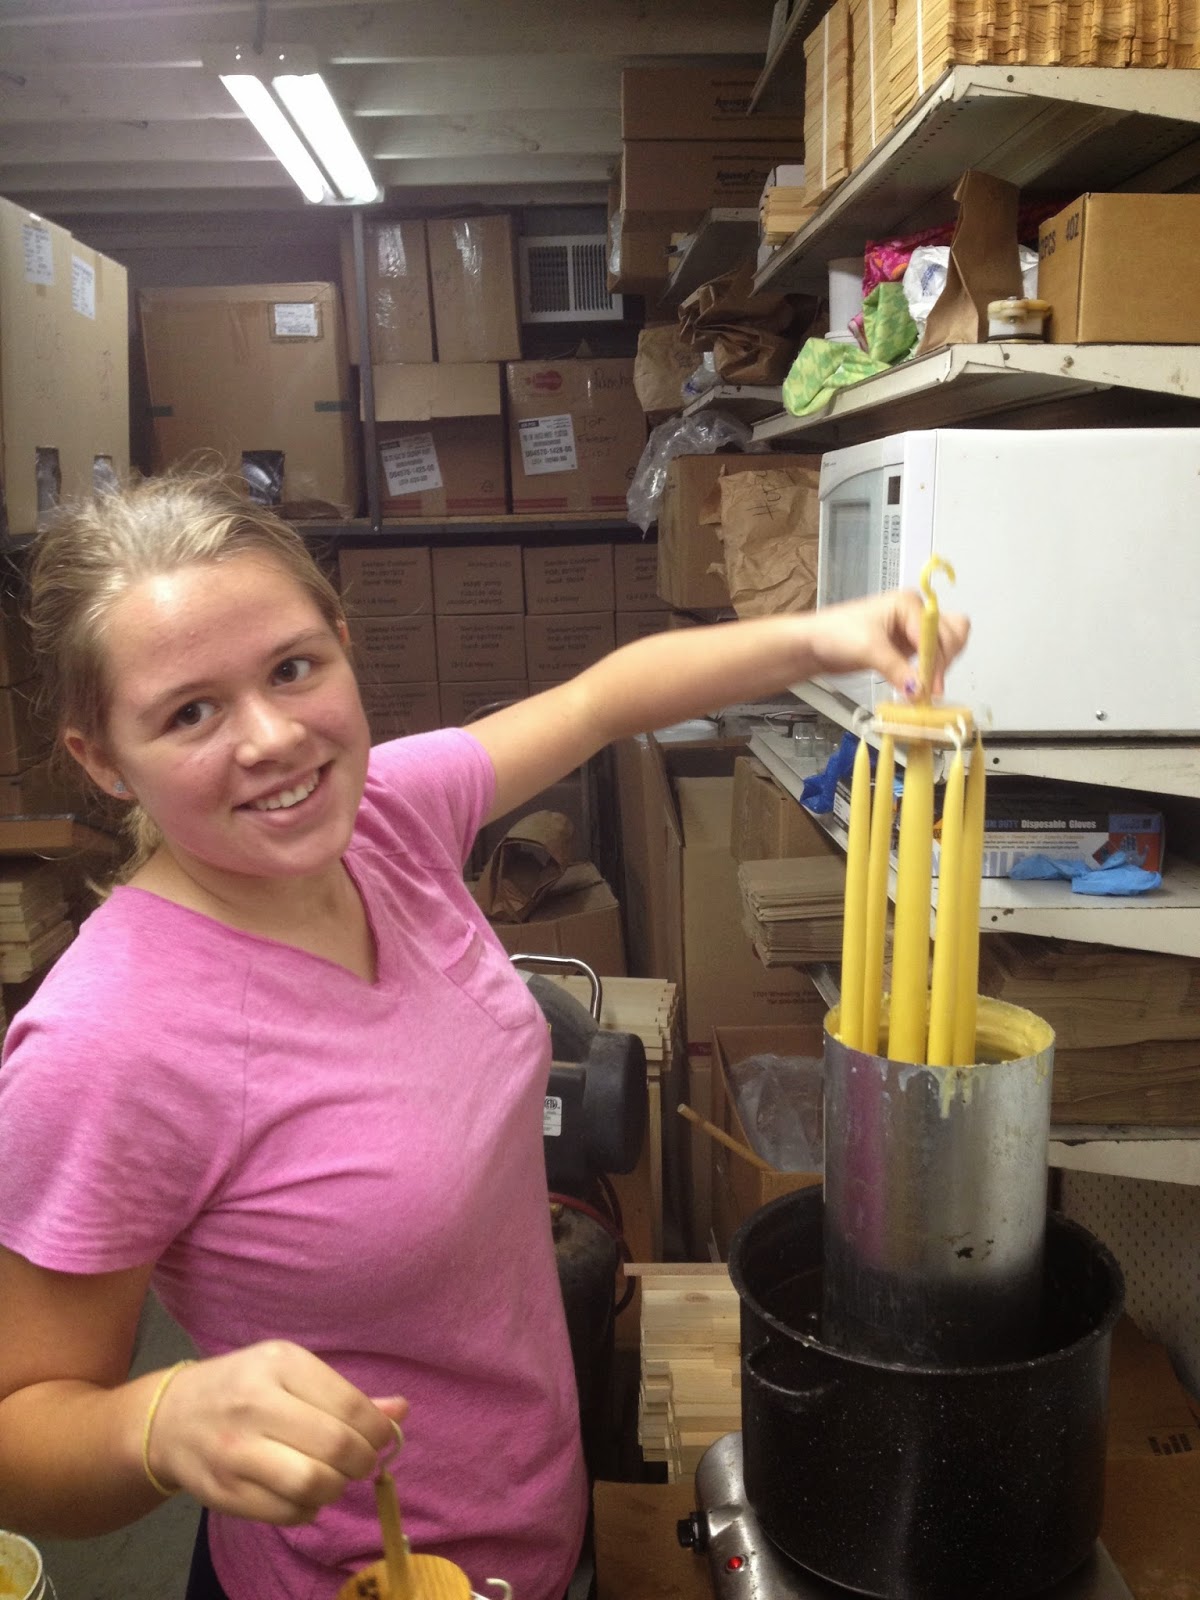
The feature event at the candle classes is making hand dipped tapers. Dipping candles works better as a group activity. It requires a larger quantity of beeswax than most hobby beekeeper will ever be able to accumulate. My dip tank holds about 10 pounds of beeswax and I must have close to another ten pounds of liquid beeswax available to keep feeding the dip tank. The wax is consumed as the candles grow so I am continually adding more wax. When we are finished I still have about ten pounds of wax in the dip tank.
There has to be a certain interval between dips. If the interval is too short, the candles don't cool sufficiently between dips and fail to grow as quickly as they should. On the other hand, if the interval is too long the new layers of wax don't adhere properly. I've found through experience that if I dip twelve racks of tapers I end up with just about the right interval. I use dipping racks that each produce two pairs of tapers connected by a common wick. We end up making a total of 48 tapers during each class. Ideally I end up with six people in the class so that each student gets to dip two racks and I just monitor the wax level in the dip tank. I only had four people in the first class so I was rather busy managing the beeswax level in the dip tank as well as dipping the extra four racks of candles.
I have never counted the number of dips it takes to make a taper. I'm always too busy paying attention to other things. On Thursday one of my students was curious enough to persist in counting the dips. It turns out that 25 dips is enough to make a hand dipped taper. That was a lot less dips than I had expected. One advantage to having less students in a class is that the students didn't buy up every last taper we made. At the end of the day I actually ended up with a few dipped tapers to sell in the store. I made another batch of dipped tapers on Saturday afternoon with the able assistance of my grand daughter, Madelynn.
In addition to the tapers we poured votives and several pillars. I have a lot of votive and tea light molds. When I pour votives or tea lights I usually do about 40 or more at a time. I also have about 15 different flexible silicon molds that are available for use at the candle classes, including various sizes of pillars, three different sizes of pine cones, three different bee skep molds, and a few others. I also have an eleven piece nativity set which I never pour as candles even though they are technically candle molds and have holes for the wicks. After all, who is going to burn Mary or Joseph or the baby Jesus? It really isn't practical to pour the nativity set at a candle class. First of all, they are a bit difficult to pour. The optimum time to remove some of the figures is about four or five hours after pouring. I'm just not inclined to wait around at the store until two or three in the morning until the time is right. If I wait until the next morning, the wax has become more brittle and it is harder to remove the pieces from their molds without damaging them. I suppose the other option would be to use the honey warming cabinet to warm them up a bit before attempting to remove them from the molds. The animal figures are particularly difficult. If I'm not careful, I end up with what my friend Quentin calls Wyoming donkeys or cows. Those are ones which have lost part of an ear to frostbite.
The feature event at the candle classes is making hand dipped tapers. Dipping candles works better as a group activity. It requires a larger quantity of beeswax than most hobby beekeeper will ever be able to accumulate. My dip tank holds about 10 pounds of beeswax and I must have close to another ten pounds of liquid beeswax available to keep feeding the dip tank. The wax is consumed as the candles grow so I am continually adding more wax. When we are finished I still have about ten pounds of wax in the dip tank.
There has to be a certain interval between dips. If the interval is too short, the candles don't cool sufficiently between dips and fail to grow as quickly as they should. On the other hand, if the interval is too long the new layers of wax don't adhere properly. I've found through experience that if I dip twelve racks of tapers I end up with just about the right interval. I use dipping racks that each produce two pairs of tapers connected by a common wick. We end up making a total of 48 tapers during each class. Ideally I end up with six people in the class so that each student gets to dip two racks and I just monitor the wax level in the dip tank. I only had four people in the first class so I was rather busy managing the beeswax level in the dip tank as well as dipping the extra four racks of candles.
 |
| Grand daughter Madelynn helps me make dipped beeswax tapers |
 |
| The beautiful finished product |
In addition to the tapers we poured votives and several pillars. I have a lot of votive and tea light molds. When I pour votives or tea lights I usually do about 40 or more at a time. I also have about 15 different flexible silicon molds that are available for use at the candle classes, including various sizes of pillars, three different sizes of pine cones, three different bee skep molds, and a few others. I also have an eleven piece nativity set which I never pour as candles even though they are technically candle molds and have holes for the wicks. After all, who is going to burn Mary or Joseph or the baby Jesus? It really isn't practical to pour the nativity set at a candle class. First of all, they are a bit difficult to pour. The optimum time to remove some of the figures is about four or five hours after pouring. I'm just not inclined to wait around at the store until two or three in the morning until the time is right. If I wait until the next morning, the wax has become more brittle and it is harder to remove the pieces from their molds without damaging them. I suppose the other option would be to use the honey warming cabinet to warm them up a bit before attempting to remove them from the molds. The animal figures are particularly difficult. If I'm not careful, I end up with what my friend Quentin calls Wyoming donkeys or cows. Those are ones which have lost part of an ear to frostbite.
Tuesday, November 11, 2014
Bird's Foot Trefoil and Wild Cucumber
Bird's Foot Trefoil is a relatively common pasture plant and ditch bank weed in our area. I noticed some bees working the blossoms several years ago and had a difficult time identifying the plant. I stumped the local master gardeners at the farmer's market and asked a number of my plant geek friends before I was finally able to discover the name. The name may seem strange at first blush, but its rather obvious once the flowers turn into seed heads. They look like mutant chicken feet with a few extra toes. I haven't noticed this plant in bloom in our area until after the blackberries have already started. It must be a decent honey plant for the bees to pay any attention to it at all but I suspect it is poor competition compared to the Himalaya Blackberries. I certainly don't have enough of it in the neighborhood to allow me to harvest Bird's Foot Trefoil honey.
I was unable to find this plant listed in the reprint of the 1926 Honey Plants of North America. I did find some small amount of information on the internet. That little article claimed that while the bees will forage on Bird's Foot Trefoil, it makes them somewhat cranky. I have not noticed any "cranky" effect on my bees, but I don't have large fields of this plant and I suspect a relatively small portion of my bees are foraging on it at any given time when it is in bloom. If that is true, I wonder whether the structure of the flowers, which is similar to a snap-dragon, may contribute to that effect.
I recently found a reference to Birdsfoot Trefoil in "Nectar and Pollen Plants of Oregon and the Pacific Northwest". This book gave the scientific name as Lotus corniculatus and indicated that it was a source of both nectar and pollen. Birdsfoot trefoil was further described as an annual or perennial of late spring and early summer, being a secondary source in irrigated pastures in the Rogue Valley. The book also mentioned reports of bees being very irritable when working this crop.
I teach beginning beekeeping classes with Dave Pehling, who is pretty knowledgeable about plants. I told him about the wild cucumber I had discovered and he advised me that it probably wasn't the same plant I had found listed in Honey Plants of North America. He then sent me a link to an article about our local wild cucumber, ( Maher oregonus). The main thrust of the internet article was that fact that this native plant is endangered on south Vancouver Island and described that as the northern limit of its range. This particular species of wild cucumber can apparently be found on the west coast as far south as northern California. The article didn't mention the plant's value as a nectar source for honeybees. I'm assuming it must have some value as a nectar source or the bees wouldn't have shown interest in it. I didn't observe that the bees were foraging for pollen so it must provide some nectar. Since I don't have any of wild cucumber growing nearby, I haven't been able to observe if it is a consistent nectar source or one of those plants that produces nectar only under certain growing conditions.
I also looked this plant up in "Nectar and Pollen Plants of Oregon and the Pacific Northwest". It gave the common name as Old-man-in-the-ground , also called wild cucumber, and described it as a climbing perennial herb which flowers produces white flowers from April through June. It was listed as both a nectar and pollen source but was also described as being of little value to honey bees. There was no explanation given as to the reason it was considered to be of little value to honeybees. It may be that it doesn't produce that much nectar or pollen under normal conditions or there may just not be enough of it in any one place to make a significant contribution to the bees' diet.
Fireweed is a great honey plant in western Washington. Its also known as Willow Herb. Unfortunately, we just don't have enough of it in the lowlands for my bees to produce fireweed honey. I'm sure some of my bees are working the fireweed, but it gets lost in a sea of blackberry nectar. As you move up into the foothills it becomes more plentiful and it is possible to produce fireweed honey. One of the peculiar things about fireweed honey in our area is that it varies from year to year. The reason for this is the presence in the mountains of another local honey plant called Pearly Everlasting, a sort of wild strawflower. Pearly Everlasting produces a dark honey so the color and flavor of the fireweed honey varies from year to year depending on the percentage of nectar obtained from Pearly Everlasting.
I let some fireweed come up in one of my wife's flower gardens several years ago and it almost took over. I had no idea it would spread so vigorously from the roots. I guess the "weed" portion of the name should have been a clue. I would have been content to let the fireweed continue to spread. After all, it produces beautiful flowers and good forage for the bees. That seemed like a win win situation to me. However, my wife had other plans for that portion of her flower garden and decided the fireweed had to go. She pulled up most of it but I noticed we still have a few stalks left. I think I am going to dig those up and plant them in some less cultivated places where they will be free to spread without incurring Linda's wrath.
 |
| Bird's foot Trefoil with both flowers and seed heads evident |
I was unable to find this plant listed in the reprint of the 1926 Honey Plants of North America. I did find some small amount of information on the internet. That little article claimed that while the bees will forage on Bird's Foot Trefoil, it makes them somewhat cranky. I have not noticed any "cranky" effect on my bees, but I don't have large fields of this plant and I suspect a relatively small portion of my bees are foraging on it at any given time when it is in bloom. If that is true, I wonder whether the structure of the flowers, which is similar to a snap-dragon, may contribute to that effect.
I recently found a reference to Birdsfoot Trefoil in "Nectar and Pollen Plants of Oregon and the Pacific Northwest". This book gave the scientific name as Lotus corniculatus and indicated that it was a source of both nectar and pollen. Birdsfoot trefoil was further described as an annual or perennial of late spring and early summer, being a secondary source in irrigated pastures in the Rogue Valley. The book also mentioned reports of bees being very irritable when working this crop.
I teach beginning beekeeping classes with Dave Pehling, who is pretty knowledgeable about plants. I told him about the wild cucumber I had discovered and he advised me that it probably wasn't the same plant I had found listed in Honey Plants of North America. He then sent me a link to an article about our local wild cucumber, ( Maher oregonus). The main thrust of the internet article was that fact that this native plant is endangered on south Vancouver Island and described that as the northern limit of its range. This particular species of wild cucumber can apparently be found on the west coast as far south as northern California. The article didn't mention the plant's value as a nectar source for honeybees. I'm assuming it must have some value as a nectar source or the bees wouldn't have shown interest in it. I didn't observe that the bees were foraging for pollen so it must provide some nectar. Since I don't have any of wild cucumber growing nearby, I haven't been able to observe if it is a consistent nectar source or one of those plants that produces nectar only under certain growing conditions.
I also looked this plant up in "Nectar and Pollen Plants of Oregon and the Pacific Northwest". It gave the common name as Old-man-in-the-ground , also called wild cucumber, and described it as a climbing perennial herb which flowers produces white flowers from April through June. It was listed as both a nectar and pollen source but was also described as being of little value to honey bees. There was no explanation given as to the reason it was considered to be of little value to honeybees. It may be that it doesn't produce that much nectar or pollen under normal conditions or there may just not be enough of it in any one place to make a significant contribution to the bees' diet.
Fireweed is a great honey plant in western Washington. Its also known as Willow Herb. Unfortunately, we just don't have enough of it in the lowlands for my bees to produce fireweed honey. I'm sure some of my bees are working the fireweed, but it gets lost in a sea of blackberry nectar. As you move up into the foothills it becomes more plentiful and it is possible to produce fireweed honey. One of the peculiar things about fireweed honey in our area is that it varies from year to year. The reason for this is the presence in the mountains of another local honey plant called Pearly Everlasting, a sort of wild strawflower. Pearly Everlasting produces a dark honey so the color and flavor of the fireweed honey varies from year to year depending on the percentage of nectar obtained from Pearly Everlasting.
 |
| Fireweed also known as Willow-Herb |
I let some fireweed come up in one of my wife's flower gardens several years ago and it almost took over. I had no idea it would spread so vigorously from the roots. I guess the "weed" portion of the name should have been a clue. I would have been content to let the fireweed continue to spread. After all, it produces beautiful flowers and good forage for the bees. That seemed like a win win situation to me. However, my wife had other plans for that portion of her flower garden and decided the fireweed had to go. She pulled up most of it but I noticed we still have a few stalks left. I think I am going to dig those up and plant them in some less cultivated places where they will be free to spread without incurring Linda's wrath.
Tuesday, October 28, 2014
Candling Mason Bee Cocoons
In addition to selling equipment and supplies relating to honeybees, we also sell equipment pertaining to mason bees. For the benefit of those unfamiliar with mason bees, they are a type of solitary bee which emerges in the spring, just in time to pollinate our spring tree fruit. While not everybody is cut out to keep honeybees, just about anybody can do mason bees. They are easier, simpler and much less expensive. The big down side to mason bees is that they don't produce honey. They just help us have a good fruit crop. As much as I love honeybees, the mason bees are much more efficient pollinators and will work in cooler and wetter conditions than the honeybees. In spite of having twelve beehives in the back yard, I didn't get cherries every year until I started keeping mason bees.
We sell several different styles and sizes of mason bee housing, all purchased from BeeDiverse, a Canadian company located in Coquitlam, BC. The key component of their mason bee housing is a stackable nesting tray. I sell the BeeDivers nests because I use them at home and I really like them. I consider them a serious improvement over the homemade nests I previously used. The main advantages to the use of the BeeDiverse stackable trays are their durability and the ease of harvesting the cocoons in the fall and preparing the nests for reuse the following spring.
Every fall, sometime after September first and prior to Christmas, I take apart the stackable nesting trays, remove the cocoons, wash them, candle them, and then store them in a cool place for the winter. I washed the cocoons several weeks ago. The cocoons have to be washed first to remove parasitic pollen mites and in order for the candling to be effective. Today I candled the clean cocoons to make sure they were viable and that they weren't infested with parasites. That was kind of a long introduction to get to the topic of today's post.
I use the large six volt flashlight shown in the above photo to candle the cocoons. The flashlight lens has to be completely covered for it to work well. Since our bathroom at work has no window that is a great place to candle the cocoons. I turn on the flashlight, shut the door and then I can easily see which cocoons I need to cull. Most of the cocoons that have too much light passing through are bad. Sometimes you can see the silhouette of an adult bee that stretches from one end of the cocoon to the other. This is actually easier to see in real life than it is in the photos.
At the top of the above photo you can see curled up mason bee larvae that failed to pupate. In the center of the photo there are about a dozen wasp larvae in an opened cocoon. The adult chalchid wasp is about the same size as the larvae in the photo. The entire cocoon isn't as long as the nail on my little finger. Yet this little wasp has an ovipositor that can penetrate through a half inch of wood. They truly are amazing little creatures.
We sell several different styles and sizes of mason bee housing, all purchased from BeeDiverse, a Canadian company located in Coquitlam, BC. The key component of their mason bee housing is a stackable nesting tray. I sell the BeeDivers nests because I use them at home and I really like them. I consider them a serious improvement over the homemade nests I previously used. The main advantages to the use of the BeeDiverse stackable trays are their durability and the ease of harvesting the cocoons in the fall and preparing the nests for reuse the following spring.
Every fall, sometime after September first and prior to Christmas, I take apart the stackable nesting trays, remove the cocoons, wash them, candle them, and then store them in a cool place for the winter. I washed the cocoons several weeks ago. The cocoons have to be washed first to remove parasitic pollen mites and in order for the candling to be effective. Today I candled the clean cocoons to make sure they were viable and that they weren't infested with parasites. That was kind of a long introduction to get to the topic of today's post.
 |
| Flashlight lens covered with cocoons |
 |
In the above photo you can see that two particular larvae failed to pupate. They spun their cocoon, then died. The dead larvae are silhouetted as they lie curled up in one end of the cocoon.
 |
| Cocoon parasitized by wasps |
In this photo lots of little cigar shaped objects are visible in one of the cocoons. That particular cocoon has been parasitized by a chalchid wasp. Most parasitic wasps are considered to be beneficial insects, but this particular wasp has chosen to attack another beneficial insect instead of a pest.
I harvested 349 mason bee cocoons from four of my nesting blocks. I only had to cull 20 of those cocoons. I cut open about half of the culled cocoons in order to get some photos of the contents. Most of my culled cocoons had larvae which failed to pupate. Culling out those cocoons would only be important if I were selling the cocoons. I don't leave my mason bee blocks out all summer. I usually take them down as soon as it appears that the bees are done with them. I put them on a shelve in the garage or take them down to the shop. Generally bad things are more likely to happen if the blocks are left outside. They might be discovered by a woodpecker or a flicker and predation by the parasitic wasps is very likely. The reason I only found one of the cocoons with wasp larvae is mainly due to the fact that I took the blocks inside once the bees were done with them.
 |
Wasp larvae from the culled cocoon |
At the top of the above photo you can see curled up mason bee larvae that failed to pupate. In the center of the photo there are about a dozen wasp larvae in an opened cocoon. The adult chalchid wasp is about the same size as the larvae in the photo. The entire cocoon isn't as long as the nail on my little finger. Yet this little wasp has an ovipositor that can penetrate through a half inch of wood. They truly are amazing little creatures.
Wednesday, October 22, 2014
Observation Hive, October 21, 2014
I've noticed a few changes in the observation hive this past week. First of all there has been a noticeable decrease in their honey stores. That is probably due to the fact that I failed to make up sugar syrup last week and the feeder ran dry for three days. I put a new jar of syrup in their feeder last Saturday. The bees then took until Tuesday afternoon to consume one quart of sugar syrup. A month ago I was having to change out the feeder bottle every other day so their appetite has diminished a little. Obviously there isn't much in the way of nectar available here for the bees in mid October so maybe they need a little time to get back into nectar foraging mode.
On the other hand, the bees have been bringing in lots of pollen. I watched returning foragers this afternoon and a fairly high percentage of them were carrying pollen. The observation hive consists of four deep frames stacked vertically. the lower three frames were mainly devoted to brood in mid September. Now the middle two frames have only half the brood they did a month ago while the lower frame has no brood at all. On the other hand the amount of pollen stored in that lower frame has steadily increased over the past two weeks. When I looked at it this morning it seemed that about half of the frame is currently devoted to pollen storage.
I will give you a little run down on how our observation hive is configured. As I mentioned above, the observation hive itself consists of four vertical deep frames. This is mounted onto a rotating base, which is in turn mounted on a deep hive body with ten frames. The deep hive body serves as an overflow area as well as a route to the clear plastic tunnel leading to the feeder and the outside. I don't know how much the bees are using this lower area. Neither of the two earlier colonies which resided in the observation hive ever expanded into the deep hive body. They never drew out the comb or stored anything it it. They merely transited through it in order to get to the outside. This hive body is mounted on a second deep hive body which is only used to house a clean out tray with a screen bottom and a wooden slide out tray. The clean out tray allows me to remove the dead bees from the hive so that the bees don't have to carry them up the clear plastic tube in order to give them a proper honeybee funeral ceremony. The wooden slide out device at the very bottom allows me to monitor the health of the colony by watching what debris falls onto it. Beneath all of this is a metal framed dolly (the equivalent of a piano dolly on steroids). A plastic tube exits the hive body and quickly reaches a T where one way leads to the outside while the other way leads to a feeding station. We replaced the upper part of the window with a piece of plywood painted black. There is a two inch diameter hole in the plywood and we have attached a front mount pollen trap which serves the bees as kind of a landing pad.
We added a strip of hardware cloth which runs through the vertical section of the exit tube. That is a very important feature as without it, when ever a bee lost her footing she would cause a snowballing chain reaction of bees tumbling down the tube. The reason for the screened bottom clean out drawer is that the bees find it next to impossible to drag out the dead up the long vertical exit tube. The short video clip below shows the pollen trap we installed for a landing pad.
I usually have sheets of styrofoam insulation covering the glass panels of the observation hive to help the bees maintain that 22 degree temperature differential between the 70 degree ambient temperature of the inside of the store to the 92 degree temperature at which they incubate brood. I think one of the biggest problems maintaining bees in this particular observation hive is that there is so much exposed glass.
On the other hand, the bees have been bringing in lots of pollen. I watched returning foragers this afternoon and a fairly high percentage of them were carrying pollen. The observation hive consists of four deep frames stacked vertically. the lower three frames were mainly devoted to brood in mid September. Now the middle two frames have only half the brood they did a month ago while the lower frame has no brood at all. On the other hand the amount of pollen stored in that lower frame has steadily increased over the past two weeks. When I looked at it this morning it seemed that about half of the frame is currently devoted to pollen storage.
 |
| Two returning foragers loaded with pollen |
I will give you a little run down on how our observation hive is configured. As I mentioned above, the observation hive itself consists of four vertical deep frames. This is mounted onto a rotating base, which is in turn mounted on a deep hive body with ten frames. The deep hive body serves as an overflow area as well as a route to the clear plastic tunnel leading to the feeder and the outside. I don't know how much the bees are using this lower area. Neither of the two earlier colonies which resided in the observation hive ever expanded into the deep hive body. They never drew out the comb or stored anything it it. They merely transited through it in order to get to the outside. This hive body is mounted on a second deep hive body which is only used to house a clean out tray with a screen bottom and a wooden slide out tray. The clean out tray allows me to remove the dead bees from the hive so that the bees don't have to carry them up the clear plastic tube in order to give them a proper honeybee funeral ceremony. The wooden slide out device at the very bottom allows me to monitor the health of the colony by watching what debris falls onto it. Beneath all of this is a metal framed dolly (the equivalent of a piano dolly on steroids). A plastic tube exits the hive body and quickly reaches a T where one way leads to the outside while the other way leads to a feeding station. We replaced the upper part of the window with a piece of plywood painted black. There is a two inch diameter hole in the plywood and we have attached a front mount pollen trap which serves the bees as kind of a landing pad.
 |
| The Beez Neez Observation Hive |
 |
| Our pollen trap landing pad. |
I usually have sheets of styrofoam insulation covering the glass panels of the observation hive to help the bees maintain that 22 degree temperature differential between the 70 degree ambient temperature of the inside of the store to the 92 degree temperature at which they incubate brood. I think one of the biggest problems maintaining bees in this particular observation hive is that there is so much exposed glass.
Monday, October 20, 2014
More Fun with Propolis
I thought I would do yet another post on the subject of propolis and its many uses. The word propolis comes from two Greek words, "pro", meaning before or in front of, and "polis", meaning city. This name came about due to the bees use of propolis to reduce or restrict the entrance of their colony during the winter. The normal location of a feral colony in most parts of the world is in a hollow tree. If the opening is too large for that particular climate, the bees simply add propolis to the opening until the size of the hole suits them. Some races of honeybees use propolis more enthusiastically than others. Caucasions are famous for their extensive gathering of propolis. I read once in one of the bee journals that Italian honeybees gather only 35% of the amount of propolis that Caucasion honeybees collect. Most beekeepers would prefer their bees gathered less propolis as the bees use it to glue everything together such that hive exams are more difficult. I have Italian honeybees and I thought they gathered a great deal of propolis. I can't imagine dealing with a three fold increase of propolis in my hives.
This past week I attended a wonderful presentation by Sue Cobey at our bee club meeting. She is the world renown expert in the artificial insemination of honeybees. She is currently involved in WSU's efforts to collect semen from drone honeybees in various parts of the world to try to improve the genetic diversity of honeybees in the United States. It is much easier to get a permit to import semen than it is to import live bees and cryogenically frozen semen doesn't pose the same level of risk of importing new parasites and diseases. Some of the places the WSU team has visited thus far include Slovenia, Germany, Northern Italy, Turkey, and Georgia (not the Georgia where the Atlanta Braves reside). She showed some photos and videos of Caucasion honeybees using propolis to reduce the size of the hive entrance. It was absolutely amazing how much propolis these bees gathered.
Until the past year, my use of propolis mainly consisted of using it as a substitute for modeling clay to make small sculptures. I have a little menagerie of propolis animals at the bee store which include an alligator, a penguin, a snail, and a pig. At about seventy degrees propolis is fairly hard. At colder temperatures it becomes quite brittle. At warmer temperatures propolis becomes soft and more malleable until at some point it turns into a little tar baby and sticks to everything. I sculpted the little pig in the photo below while I was working at the Open Honey and Beeswax display at the Evergreen State Fair. I was inspired by the fact that the pig barn was a relatively short distance away. I can tell that this photo was taken shortly after I made the pig. When kneaded for a few minutes, our local propolis starts out yellow. Exposure to the air turns the propolis to a dark reddish color within a couple of weeks.
This past week I attended a wonderful presentation by Sue Cobey at our bee club meeting. She is the world renown expert in the artificial insemination of honeybees. She is currently involved in WSU's efforts to collect semen from drone honeybees in various parts of the world to try to improve the genetic diversity of honeybees in the United States. It is much easier to get a permit to import semen than it is to import live bees and cryogenically frozen semen doesn't pose the same level of risk of importing new parasites and diseases. Some of the places the WSU team has visited thus far include Slovenia, Germany, Northern Italy, Turkey, and Georgia (not the Georgia where the Atlanta Braves reside). She showed some photos and videos of Caucasion honeybees using propolis to reduce the size of the hive entrance. It was absolutely amazing how much propolis these bees gathered.
Until the past year, my use of propolis mainly consisted of using it as a substitute for modeling clay to make small sculptures. I have a little menagerie of propolis animals at the bee store which include an alligator, a penguin, a snail, and a pig. At about seventy degrees propolis is fairly hard. At colder temperatures it becomes quite brittle. At warmer temperatures propolis becomes soft and more malleable until at some point it turns into a little tar baby and sticks to everything. I sculpted the little pig in the photo below while I was working at the Open Honey and Beeswax display at the Evergreen State Fair. I was inspired by the fact that the pig barn was a relatively short distance away. I can tell that this photo was taken shortly after I made the pig. When kneaded for a few minutes, our local propolis starts out yellow. Exposure to the air turns the propolis to a dark reddish color within a couple of weeks.
 |
| Propolis pig, newly formed in August, 2013 |
 |
| The same pig, over one year later |
Propolis is used in cosmetics, hand cream, lip balsam, and for medicinal purposes. I have Russian and Ukrainian customers who are avid proponents of the medical uses of propolis. One Russian customer told me that his sixteen year old son had a serious problem with warts on his face and head, a terrible affliction for a teenager. He took his son to a dermatologist who used medication, freezing, and burning in successive efforts to get rid of the warts. After each treatment, the warts returned. Finally he resorted to East European folk medicine and began to give his son a daily dose of propolis dissolved in rum. Within two weeks all of the warts were gone and they never came back. the Russians and Ukrainians use propolis tinctures both internally and topically. Propolis is soluble in alcohol, but is not soluble in water. Vodka is the usual East European choice for making a tincture. I can only assume that rum was used as the "kiddie version".
I recently made some propolis tincture at the request of my daughter-in-law. I found some useful instructions on the internet. It was in a blog post by someone associated with the honeybee program at the University of Minnesota. There were instructions for making either 10, 20, or 30% propolis solutions, with the weight of propolis given in both ounces and grams and the liquid given by both weight and volume. I used 150 proof vodka as the solvent and it took about a week to get most of the propolis to dissolve. I filtered the tincture through a paper towel to remove any wax and debris.
I had a customer request to purchase some propolis this past week. She wanted it to make a medicinal tincture. I was not very anxious to part with any of my limited supply, especially since I have begun using it to make propolis varnish. I told her I could sell her one ounce for ten dollars. Sadly, she was willing to pay that much.
I had a customer request to purchase some propolis this past week. She wanted it to make a medicinal tincture. I was not very anxious to part with any of my limited supply, especially since I have begun using it to make propolis varnish. I told her I could sell her one ounce for ten dollars. Sadly, she was willing to pay that much.
Friday, October 17, 2014
Propolis Varnish
I've always had a fascination with propolis, sometimes referred to as bee glue. It is a sticky resinous substance the bees collect from new growth buds of a variety of different plants. In spite of the fact that it is collected from diverse sources, the properties of propolis are fairly constant. The color can vary somewhat depending on when and where it was collected, but it remains a sticky anti-microbial secondary building material for the bees.
I had read in Beekeeping for Dummies about a propolis varnish used by an individual who does repairs to museum quality violins. It mentioned the ingredients and proportions, but failed to give sufficiently detailed instructions on how to make the stuff. I poked around on the internet and stumbled onto a Canoe forum where someone had posted the instructions I was seeking. The varnish had the same ingredients in the same proportions as the recipe in Beekeeping for Dummies. The person who had posted the recipe raved about the durability and water proof nature of this varnish, both important characteristics for varnishing wooden canoes and paddles.
The directions are fairly simple. Combine 4 ounces blond shellac, 1 ounce manila copal, and one ounce of propolis with one pint of denatured alcohol into a jar with a lid. Shake the jar frequently over the course of a week or more until all of the ingredients are dissolved. The shellac dissolved quickly, while the manila copal and propolis took longer. Once everything is dissolved that is going to dissolve, strain the varnish through a nylon stocking to remove any remaining debris. I decided to dewax the propolis prior to using it. Propolis contains about 35% beeswax and I was unsure if that would cause problems with the varnish. I did this using a number ten can and a small canning kettle to make a double boiler. I put about 8 ounces of propolis in the can, filled it with water, and cooked that in the double boiler for about four hours. After the can and water cooled, I was left with a layer of beeswax on the surface and the propolis on the bottom. Propolis is heavier than water while beeswax is lighter than water. I don't know if that step was really necessary as I don't believe beeswax will dissolve in alcohol. However, it did result in less debris to strain out at the end. In order to expedite the dissolving of the propolis, I put the dewaxed propolis into the freezer for several hours. Once it was very cold, I put the propolis into a bag and beat on it with a mallet to shatter it into tiny fragments.
I purchased the blond shellac and manila copal resin from Woodfinishing Enterprises, 1729 N 68th Street, Wauwatosa, WI 53213, telephone (414) 774-1724. They have a wonderful online catalog featuring an incredible array of exotic substances useful to woodworkers. I thought their prices were quite reasonable.
I made some propolis varnish this past summer and used it to varnish some wooden folding chairs a friend had given to me. The chairs looked pretty ratty before I varnished them. My wife even asked if she could burn them. After just one coat of the propolis varnish the chairs were magically transformed from junk to something Linda would actually let me bring into the house. I accidentally left one of the chairs outside and it rained. When I discovered the wet chair, there was no opaqueness and the water was beaded up nicely. I also used the propolis varnish to put a nice finish on my Ulster Observation Hive. I have a little fiberglass rowboat I'm in the process of refinishing. I intend to use the propolis varnish on the seats and all the wooden trim.
I had read in Beekeeping for Dummies about a propolis varnish used by an individual who does repairs to museum quality violins. It mentioned the ingredients and proportions, but failed to give sufficiently detailed instructions on how to make the stuff. I poked around on the internet and stumbled onto a Canoe forum where someone had posted the instructions I was seeking. The varnish had the same ingredients in the same proportions as the recipe in Beekeeping for Dummies. The person who had posted the recipe raved about the durability and water proof nature of this varnish, both important characteristics for varnishing wooden canoes and paddles.
The directions are fairly simple. Combine 4 ounces blond shellac, 1 ounce manila copal, and one ounce of propolis with one pint of denatured alcohol into a jar with a lid. Shake the jar frequently over the course of a week or more until all of the ingredients are dissolved. The shellac dissolved quickly, while the manila copal and propolis took longer. Once everything is dissolved that is going to dissolve, strain the varnish through a nylon stocking to remove any remaining debris. I decided to dewax the propolis prior to using it. Propolis contains about 35% beeswax and I was unsure if that would cause problems with the varnish. I did this using a number ten can and a small canning kettle to make a double boiler. I put about 8 ounces of propolis in the can, filled it with water, and cooked that in the double boiler for about four hours. After the can and water cooled, I was left with a layer of beeswax on the surface and the propolis on the bottom. Propolis is heavier than water while beeswax is lighter than water. I don't know if that step was really necessary as I don't believe beeswax will dissolve in alcohol. However, it did result in less debris to strain out at the end. In order to expedite the dissolving of the propolis, I put the dewaxed propolis into the freezer for several hours. Once it was very cold, I put the propolis into a bag and beat on it with a mallet to shatter it into tiny fragments.
I purchased the blond shellac and manila copal resin from Woodfinishing Enterprises, 1729 N 68th Street, Wauwatosa, WI 53213, telephone (414) 774-1724. They have a wonderful online catalog featuring an incredible array of exotic substances useful to woodworkers. I thought their prices were quite reasonable.
 |
| Blond Shellac |
 |
| Manila Copal resin |
 |
| Propolis |
 |
| Propolis Varnish in progress |
I made some propolis varnish this past summer and used it to varnish some wooden folding chairs a friend had given to me. The chairs looked pretty ratty before I varnished them. My wife even asked if she could burn them. After just one coat of the propolis varnish the chairs were magically transformed from junk to something Linda would actually let me bring into the house. I accidentally left one of the chairs outside and it rained. When I discovered the wet chair, there was no opaqueness and the water was beaded up nicely. I also used the propolis varnish to put a nice finish on my Ulster Observation Hive. I have a little fiberglass rowboat I'm in the process of refinishing. I intend to use the propolis varnish on the seats and all the wooden trim.
 |
| Folding wooden chair with one coat of propolis varnish |
Thursday, October 16, 2014
Overwintering Bees in the Observation Hive
I have tried several times over the past few years to let the colony in the observation hive in the store try to overwinter. Both times it ended badly for the bees. I'm not sure why they have such difficulty surviving the winter in the observation hive.
First of all, the observation colony is always a relatively new split with a new queen so mites and other parasites haven't had as much time to build up to seriously harmful levels. Secondly, I keep that part of the store at 70 degrees, mainly to keep my inventory of honey in a liquid state for a longer period of time. I also keep pieces of styrofoam insulation covering the sides of the observation hive when I am not actually looking at them. I do that to make it easier for the bees to maintain an appropriate temperature for their brood. They incubate their brood at 92 degrees Fahrenheit, 22 degrees warmer then the ambient temperature of the store. Thirdly, I give them lots of sugar syrup. One colony dwindled away in January and another one survived until early February. It seems really counter-intuitive to me that the bees would have such difficulty overwintering in the observation hive. One would think overwintering inside the store would be the honeybee equivalent of living on easy street.
I decided to try it a third time because the current colony occupying my observation hive seems a little different. They did a much better job accumulating stores for the winter and the queen actually reduced the brood nest at the time of year when that behavior would be expected. They seemed like a worthy colony for another attempt.
I decided I would try to do the normal fall medications that I do with my other colonies. I fed them about a gallon of 2:1 sugar syrup medicated with fumagilin over a period of a month as a treatment for nosema. I would have given twice that amount to a full size colony. After that I have continued to keep them well supplied with 2:1 sugar syrup.
I had observed only an occasional varroa mite on the bottom clean out board. That fact, along with the relative newness of the colony caused me to think varroa mite levels probably weren't very high. I decided to treat the hive anyway using ApilifeVar, a mite treatment from Italy. It is basically a thin wafer of florist foam which has been impregnated with thymol, eucalyptus, and menthol. I have found it to be a fairly effective mite treatment and have used it off and on for about eight years. Since it is a rather small colony, consisting of just 4 frames, I used half the usual dosage. Since I didn't want to go to the trouble of taking the observation hive outside, I simply placed the medication in one of the upper vent holes on each side and covered it those vent holes with duct tape. This first mite treatment was done on October 8th.
I checked the bottom clean out board this morning (October 16) and found about 20 dead mites. It wasn't a huge amount, but it told me that there were more mites in the hive than I had suspected. Based on those results I thought I worthwhile to continue with a second treatment. Since there is no drone brood in the colony, I'm going to call it good with the two varroa treatments, rather than the three treatments advised in the label instructions. Normally I'm treating with ApilifeVar in late August or early September so there is often still drone brood in the hive. There are some dead varroa mites below but they are a bit harder to spot in the photo. There is one located in almost the very center of the photo, the size of a pin head, shiny reddish-maroon.
 |
| Queen Nora the First, the reigning monarch of the observation hive |
First of all, the observation colony is always a relatively new split with a new queen so mites and other parasites haven't had as much time to build up to seriously harmful levels. Secondly, I keep that part of the store at 70 degrees, mainly to keep my inventory of honey in a liquid state for a longer period of time. I also keep pieces of styrofoam insulation covering the sides of the observation hive when I am not actually looking at them. I do that to make it easier for the bees to maintain an appropriate temperature for their brood. They incubate their brood at 92 degrees Fahrenheit, 22 degrees warmer then the ambient temperature of the store. Thirdly, I give them lots of sugar syrup. One colony dwindled away in January and another one survived until early February. It seems really counter-intuitive to me that the bees would have such difficulty overwintering in the observation hive. One would think overwintering inside the store would be the honeybee equivalent of living on easy street.
I decided to try it a third time because the current colony occupying my observation hive seems a little different. They did a much better job accumulating stores for the winter and the queen actually reduced the brood nest at the time of year when that behavior would be expected. They seemed like a worthy colony for another attempt.
 |
| The hive has collected a lot of glistening nectar/syrup. |
I decided I would try to do the normal fall medications that I do with my other colonies. I fed them about a gallon of 2:1 sugar syrup medicated with fumagilin over a period of a month as a treatment for nosema. I would have given twice that amount to a full size colony. After that I have continued to keep them well supplied with 2:1 sugar syrup.
 |
| A few pieces of apilifeVar place in the vent hole |
 |
| A bit of duct tape to seal in the medication |
I checked the bottom clean out board this morning (October 16) and found about 20 dead mites. It wasn't a huge amount, but it told me that there were more mites in the hive than I had suspected. Based on those results I thought I worthwhile to continue with a second treatment. Since there is no drone brood in the colony, I'm going to call it good with the two varroa treatments, rather than the three treatments advised in the label instructions. Normally I'm treating with ApilifeVar in late August or early September so there is often still drone brood in the hive. There are some dead varroa mites below but they are a bit harder to spot in the photo. There is one located in almost the very center of the photo, the size of a pin head, shiny reddish-maroon.
 |
| The bottom clean out board on October 16 |
Friday, September 21, 2012
Feeding the bees...to family and friends
I had an unusual call yesterday from an author, David George Gordon. He was working to have one of his earlier books updated and republished, a book about eating insects. The book provides information about various cultures that eat insects as well as some recipes. He needed some help preparing for a photo shoot. He wanted to include some photos of recipes in the updated book. The help he sought was to purchase some live bees, pupae and larvae that he could use to prepare a particular recipe, "Three Bee Salad". I arranged to sell him one frame of brood and honey from my modified Warre hive. I told him that I would like to read his book and write a review for my blog and website. He offered to send me an advance copy. The new improved book is due out in July, 2013. He has a website at www.davidgeorgegordon.com for those who are interested.
As it turns out, I had actually read one of Gordon's books before. I just didn't recollect his name. The particular book was titled "The Field Guide to the Slug". Obviously, the author's name was less memorable to me than the book title. It was an interesting book that provided a great deal of useful information about my primary gardening nemesis, the slug. Yet, it was written in a light-hearted, whimsical style that made it an enjoyable read.
The subject of eating bees and bee larvae has come up several times in the past year. When a bear attacks a bee hive his primary goal is to eat the larvae, not the honey. I have one customer who was inspired to try eating the larvae after watching a BBC documentary on honeybees. He described the larvae as tasting better than the sweetest creamed corn he ever had. While I was impressed with his enthusiasm for his new-found delicacy, I've been reluctant to try them myself. It isn't that I couldn't eat an insect as much as it just feels wrong to eat my bees.
As it turns out, I had actually read one of Gordon's books before. I just didn't recollect his name. The particular book was titled "The Field Guide to the Slug". Obviously, the author's name was less memorable to me than the book title. It was an interesting book that provided a great deal of useful information about my primary gardening nemesis, the slug. Yet, it was written in a light-hearted, whimsical style that made it an enjoyable read.
The subject of eating bees and bee larvae has come up several times in the past year. When a bear attacks a bee hive his primary goal is to eat the larvae, not the honey. I have one customer who was inspired to try eating the larvae after watching a BBC documentary on honeybees. He described the larvae as tasting better than the sweetest creamed corn he ever had. While I was impressed with his enthusiasm for his new-found delicacy, I've been reluctant to try them myself. It isn't that I couldn't eat an insect as much as it just feels wrong to eat my bees.
Monday, September 10, 2012
Warre Hive Update
My modified Warre hive has done okay this year. I didn't end up with an unmated queen from a large secondary swarm that ended up being a drone layer (my previous Warre hive experience). I say my Warre hive is modified in that it has moveable frames like a conventional beehive. What I wanted to experiment with were the smaller dimensions of the Warre hive (12x 12 inner dimensions of the brood nest) and the "quilt" as a moisture abatement mechanism. I want to see if those factors have a positive impact on the bees making it through the winter. I am unwilling to give up moveable frames and the management they allow the beekeeper. Also I am unwilling to sacrifice my bees on the altar of 100 percent natural beekeeping. Therefore I want to be able to use the more benign and natural miticides like Hopguard or Apilife and I want to be able to feed my bees if they need it and be able to give them medication for Nosema Cerana.
I realize that one hive doesn't make a very good experiment, but I haven't had the time or energy to make more than the one Warre hive. I need to have at least ten conventional Langstroth hives in order to maintain the queen banks at the bee store. That is about all of the beehives I currently have time to manage. I want to see if the Warre hive beats the average of the ten Langstroth hives when it comes to overwintering during the next five years.
We had a relatively good blackberry nectar flow this year. The Warre hive drew out comb in three and a half deep boxes (eight frames each with a comb length of 12 inches). I'm not aware that the Warre hive swarmed, but I didn't install a marked queen so I can't absolutely swear that they didn't. I harvested three deep frames that consisted of close to 100 percent capped honey. That allowed me to reduce them back down to three deep boxes, the equivalent of a two deep eight frame Langstroth hive. I am treating them for mites with Apilife VAR, which I consider to almost be an herbal treatment as the the active ingredients are thymol, eucalyptus, and menthol. I plan to feed them several gallons of 2:1 sugar syrup with fumagillin for Nosema.
I intend to use the three frames of honey to do cut comb rather than extract them. However, the SAF extractors I sell at the Beez Neez will accomodate the shorter frames from my Warre hive. It just isn't worth my trouble to extract three frames. Besides, I can always use more cut comb honey.
I realize that one hive doesn't make a very good experiment, but I haven't had the time or energy to make more than the one Warre hive. I need to have at least ten conventional Langstroth hives in order to maintain the queen banks at the bee store. That is about all of the beehives I currently have time to manage. I want to see if the Warre hive beats the average of the ten Langstroth hives when it comes to overwintering during the next five years.
We had a relatively good blackberry nectar flow this year. The Warre hive drew out comb in three and a half deep boxes (eight frames each with a comb length of 12 inches). I'm not aware that the Warre hive swarmed, but I didn't install a marked queen so I can't absolutely swear that they didn't. I harvested three deep frames that consisted of close to 100 percent capped honey. That allowed me to reduce them back down to three deep boxes, the equivalent of a two deep eight frame Langstroth hive. I am treating them for mites with Apilife VAR, which I consider to almost be an herbal treatment as the the active ingredients are thymol, eucalyptus, and menthol. I plan to feed them several gallons of 2:1 sugar syrup with fumagillin for Nosema.
 |
I intend to use the three frames of honey to do cut comb rather than extract them. However, the SAF extractors I sell at the Beez Neez will accomodate the shorter frames from my Warre hive. It just isn't worth my trouble to extract three frames. Besides, I can always use more cut comb honey.
Monday, July 16, 2012
Bait Hives
I arrived home on Saturday afternoon after being gone for a week. I was visiting one of my daughters, who lives in Forest Grove, Oregon. The reason for the trip was to participate in a 5 day Mormon pioneer handcart trek. The purpose of the handcart trek is to help the youth have a greater appreciation of sacrifices made by their ancestors. Any experience that helps a teenager develop gratitude is pretty valuable in my opinion. I had hoped to attend the Northwest District Beekeepers Association picnic when I got home, but I arrived later than I expected. Also I had visiting grand children, I discussed the matter briefly with Linda and it was readily apparent that I needed to stick around. I hope the picnic was a big success, especially the bee beard contest.
On Saturday evening, just as my son James and his wife were preparing to leave, I noticed a big cloud of bees in the immediate vicinity of my hives. I initially thought one of my hives were swarming and I went to investigate. As it turns out, it wasn't a swarm leaving, but a swarm arriving. As I got closer I saw that the bees were gathering on the front of a stack of deeps I had sitting on a double hive stand in my apiary. Since the bees were clustering on boxes that I knew were previously empty I realized it was an arrival, not a departure. I thought it was kind of strange to see a swarm leaving at 7:00 p.m. as swarms usually leave the hive in the early afternoon. I gave the bees a few days to settle in, then did a little hive exam on Monday, July 16, 2012. The bees were occupying all of the bottom deep and filled five frames in the second deep so it was a pretty good sized swarm. The third or top deep had no frames. I was lucky the bees hadn't decided to move right up to the top box and start building comb attached to the lid. I added a few frames to fill out the second box and got rid of the empty third deep. It was the easiest swarm I ever captured.
Normally I would feed a newly captured swarm, but we are in the middle of the blackberry nectar flow. The bees would probably turn up their noses (actually antennas) at any sugar syrup I offered them. Instead, I will just monitor how they are doing. If they don't manage to gather enough honey over the next six weeks to get them through the winter I will either merge them with another hive or feed them like crazy in early September.
I think its always a good idea to have an empty bait hive or a bait box in the vicinity of the apiary. Sometimes we get lucky and a swarm just shows up. At other times one of our hives may swarm when we aren't there to recover them. The ultimate bait hive guru is Thomas Seeley, the author of "Honeybee Democracy". He has spent his entire adult life studying swarm behavior and specifically what the bees are looking for in a new residence. Apparently, the minimum size of a cavity that the bees will accept is 16 liters. If you don't have enough extra boxes to set up a bait hive, a swarm trap can be cheaply assembled from a couple of large peat pots, a few drywall screws, and a couple of sticks. The drywall screws are used to attach the two peat pots together, while the sticks provide a means to attach the swarm trap at an appropriate height in a tree. Ready made swarm traps can also be found in many bee supply catalogs.
While I was checking up on the newly arrived swarm, I also checked on my other hives. Most were in pretty good shape, but a few needed another honey super. It looks like we are finally having a good blackberry nectar flow.
On Saturday evening, just as my son James and his wife were preparing to leave, I noticed a big cloud of bees in the immediate vicinity of my hives. I initially thought one of my hives were swarming and I went to investigate. As it turns out, it wasn't a swarm leaving, but a swarm arriving. As I got closer I saw that the bees were gathering on the front of a stack of deeps I had sitting on a double hive stand in my apiary. Since the bees were clustering on boxes that I knew were previously empty I realized it was an arrival, not a departure. I thought it was kind of strange to see a swarm leaving at 7:00 p.m. as swarms usually leave the hive in the early afternoon. I gave the bees a few days to settle in, then did a little hive exam on Monday, July 16, 2012. The bees were occupying all of the bottom deep and filled five frames in the second deep so it was a pretty good sized swarm. The third or top deep had no frames. I was lucky the bees hadn't decided to move right up to the top box and start building comb attached to the lid. I added a few frames to fill out the second box and got rid of the empty third deep. It was the easiest swarm I ever captured.
Normally I would feed a newly captured swarm, but we are in the middle of the blackberry nectar flow. The bees would probably turn up their noses (actually antennas) at any sugar syrup I offered them. Instead, I will just monitor how they are doing. If they don't manage to gather enough honey over the next six weeks to get them through the winter I will either merge them with another hive or feed them like crazy in early September.
I think its always a good idea to have an empty bait hive or a bait box in the vicinity of the apiary. Sometimes we get lucky and a swarm just shows up. At other times one of our hives may swarm when we aren't there to recover them. The ultimate bait hive guru is Thomas Seeley, the author of "Honeybee Democracy". He has spent his entire adult life studying swarm behavior and specifically what the bees are looking for in a new residence. Apparently, the minimum size of a cavity that the bees will accept is 16 liters. If you don't have enough extra boxes to set up a bait hive, a swarm trap can be cheaply assembled from a couple of large peat pots, a few drywall screws, and a couple of sticks. The drywall screws are used to attach the two peat pots together, while the sticks provide a means to attach the swarm trap at an appropriate height in a tree. Ready made swarm traps can also be found in many bee supply catalogs.
While I was checking up on the newly arrived swarm, I also checked on my other hives. Most were in pretty good shape, but a few needed another honey super. It looks like we are finally having a good blackberry nectar flow.
Tuesday, July 03, 2012
Observation Hive Update
 |
| Our Observation Hive is Back. |
 |
| Note the newly installed connecting comb in the center of the photo |
The colony came from one of my earlier queen banks and consisted of a little more than 5 frames of bees. I put four frames of bees in the observation portion of the hive and the rest of the bees went into the lower portion. The bees seemed to acclimate to their new home quickly and found both the feeder and the exit to the outdoors. I took some photos several hours later and found the bees had already made some connecting comb to attach one of the frames to the window of the observation hive.
 |
| Note the open brood visible between the bees. |
The observation hive currently has two frames of capped brood and two frames of empty drawn comb. Two of the frames in the lower unit are drawn, but the other eight frames are just foundation. The weather will change dramatically starting tomorrow. The fourth of July is expected to be in the high sixties. After that the temperature climbs into the high seventies and low eighties. That should cause the blackberry nectar flow to take off. It will be interesting to watch and see how fast the population of the observation hive will grow with the emergence of the capped brood and the start of a serious honey flow. I put a jar of sugar syrup in the feeder but I don't expect to have to feed them much after that jar of syrup is gone.
I took these photos with my iPhone. I was surprised that they turned out that well. I am going to have to figure out how to disable the flash.
Monday, June 11, 2012
Thimble Berries and Salmon Berries
Both thimble berries and salmon berries are in the Rubus family and are thus cousins of the raspberries. We have a lot of salmon berries in western Washington and a lesser amount of thimble berries. While there are a lot of salmon berries in my neighborhood, I've never seen my bees pay much attention to them. Neither have I noticed large quantities of nectar coming into the hives when the salmon berries are in bloom. This is something I certainly would notice as the salmon berries bloom at a time when I am always feeding my bees lots of sugar syrup.
I wasn't aware of any significant patches of thimble berries in my neighborhood until recently. This past week I noticed a patch of big white blossoms a little more than a quarter mile from my house. The thimbleberries really stood out because the surrounding blackberries weren't blooming yet. Then the following day I found another thimble berry patch about a quarter mile to the north, The first time I only noticed bumble bees working the blossoms but the temperature was only 52 degrees. Today I looked at the thimble berries when it was 72 degrees and again I only saw bumble bees working the blossoms. That may be the reason thimble berries didn't make it into the plant section in Honey Plants of North America. I would expect my bees to find any plant within a half mile that was a good nectar source.
Thimble berries actually have a pretty good flavor, but an unfortunate mealy texture. I've often thought they would make a wonderful jelly, but its hard to find a sufficient quantity in one place to make it worth the trouble to gather them. If anyone ever gives me a gift of thimble berry jelly I will know they put an awful lot of work into the gift.
 |
| Thimble berry blossoms |
I wasn't aware of any significant patches of thimble berries in my neighborhood until recently. This past week I noticed a patch of big white blossoms a little more than a quarter mile from my house. The thimbleberries really stood out because the surrounding blackberries weren't blooming yet. Then the following day I found another thimble berry patch about a quarter mile to the north, The first time I only noticed bumble bees working the blossoms but the temperature was only 52 degrees. Today I looked at the thimble berries when it was 72 degrees and again I only saw bumble bees working the blossoms. That may be the reason thimble berries didn't make it into the plant section in Honey Plants of North America. I would expect my bees to find any plant within a half mile that was a good nectar source.
Thimble berries actually have a pretty good flavor, but an unfortunate mealy texture. I've often thought they would make a wonderful jelly, but its hard to find a sufficient quantity in one place to make it worth the trouble to gather them. If anyone ever gives me a gift of thimble berry jelly I will know they put an awful lot of work into the gift.
Sunday, June 10, 2012
Feeding the Bees
Over the course of a week at the Beez Neez Apiary Supply Quentin and I spend a fair amount of time on the phone answering the questions of beginning beekeepers. This past week (the first week of June) the most common question pertained to why their bees seemed sluggish and were clustered at the entrance of the hive. This is actually a pretty easy problem to diagnosis. Our response was usually something along the line of, "When did you stop feeding your bees?" In western Washington most rural beekeepers experience a serious nectar dearth following the bloom of the Big Leaf Maple trees in late April and early May. This dearth or lack of nectar sources usually continues until the Himalaya Blackberries start to bloom. This can vary from mid June until early July, depending on the weather of a given year and the exact location of the bees. The Puget Sound area has lots of different micro climates. This is further complicated by the fact that some urban beekeepers benefit from some good nectar sources among their neighborhood landscape plants. However, this time of year can be pretty slim pickings for most rural beehives.
My advice is to never assume that you can stop feeding your bees based on some arbitrary date on the calendar. There is no substitute for looking in the hive and thus ensuring that your bees have an adequate food supply stored in their combs. You cannot rely on someone else's experience with their hives as they are usually not in your same location. Their hives may indeed have adequate stores sufficient to last them through to the start of the blackberry nectar flow. Their hives may well have benefited from nectar sources your hives did not have. The safe thing to do is to just plan on continuing to feed the bees until you notice that they have either stopped taking the syrup or you can see that they have accumulated significant stores of nectar. Even if you are able to stop feeding for a time, the food supplies of your colonies will still need to be closely monitored until the blackberries start to bloom. Assessing a colony's food stores is one of those things you are supposed to be doing whenever you open up a beehive and look at the frames.
If you find yourself in the awkward position of having a colony on the verge of starvation, you may need to sprinkle a little sugar syrup directly on the bees. If they are sluggish due to starvation, they may be too far gone to access the feeder. Oftentimes a light misting with sugar syrup will help them regain their vigor more quickly.
I think many beekeepers have had the unfortunate experience of having a hive or two starve out in the late spring. I know that I have. As a consequence I suffered a fair amount of guilt and barely managed to get through the experience without going to counseling. Ever since then I have been much more careful in monitoring the food supplies of my colonies in the spring.
My advice is to never assume that you can stop feeding your bees based on some arbitrary date on the calendar. There is no substitute for looking in the hive and thus ensuring that your bees have an adequate food supply stored in their combs. You cannot rely on someone else's experience with their hives as they are usually not in your same location. Their hives may indeed have adequate stores sufficient to last them through to the start of the blackberry nectar flow. Their hives may well have benefited from nectar sources your hives did not have. The safe thing to do is to just plan on continuing to feed the bees until you notice that they have either stopped taking the syrup or you can see that they have accumulated significant stores of nectar. Even if you are able to stop feeding for a time, the food supplies of your colonies will still need to be closely monitored until the blackberries start to bloom. Assessing a colony's food stores is one of those things you are supposed to be doing whenever you open up a beehive and look at the frames.
If you find yourself in the awkward position of having a colony on the verge of starvation, you may need to sprinkle a little sugar syrup directly on the bees. If they are sluggish due to starvation, they may be too far gone to access the feeder. Oftentimes a light misting with sugar syrup will help them regain their vigor more quickly.
I think many beekeepers have had the unfortunate experience of having a hive or two starve out in the late spring. I know that I have. As a consequence I suffered a fair amount of guilt and barely managed to get through the experience without going to counseling. Ever since then I have been much more careful in monitoring the food supplies of my colonies in the spring.
Sunday, June 03, 2012
Humble Bumbles
I was looking at my blueberries early this morning to see if we had good fruit set when I noticed several bumble bees, each just hanging onto a blossom. Apparently they had been working late, were stranded by the rain or cold, and had spent the night clinging to a blossom. I suppose it is also possible they had been stranded by an early morning rain storm. When I took this photo there were other bumblebees busily working the blueberry blossoms. I really have to admire the grit of the bumble bees. They start really early in the morning and they work until its almost black dark. I wish we had honeybees that were so well adapted to our cool maritime climate. The beehive in the background of the photo is my modified Warre hive. I took a photo of the entrance of the Warre hive just after taking this photo and there was no activity at all.
We have a huge rhododendron tree in our front yard. I say tree because it is larger than some semi-dwarf fruit trees. In late May and early June its covered with lavender pink blossoms and it is alive with bumble bees. With all of the bumble bees working the blossoms the plant is much louder than my little apiary of 10 honeybee hives. That buzz is already going strong when I go outside at 6:00 a.m. and continues past dusk. Bumble bees certainly can't be accused of working banker's hours. I've often watched the bumble bees working the blossoms, but I have only noticed a honeybee on the rhododendron once. I'm assuming the structure of the flower or the nectaries is probably such that the honeybees have difficulty working the blossoms.
It looks like our himalaya blackberries are getting close to blooming. That is probably a consequence of our relatively warm weather in May. I think we had close to ten seventy degree days scattered throughout the month. I've lived in Snohomish since 1993 and I can't recall ever having seen that much warm weather in May. I pay very close attention to the 70 degree mark as that is the magic point at which it is warm enough for queens to take mating flights. Now that we're into June the weather patterns seem to be more normal. Normal spring weather for us consists of highs in the mid to low sixties with a fair amount of rain showers, chance of showers, and chance of rain. Now I'm concerned that the blackberries will bloom several weeks before the weather will be warm enough for a good nectar flow. Himalaya blackberries seem to be very temperature sensitive where nectar production is concerned. At seventy and sunny they produce nectar profusely, At lower temperatures they seem to be a non-event for the bees.
 |
| Note the bumble bee in the center of the photo |
 |
| Modified Warre Hive with no activity at the entrance |
We have a huge rhododendron tree in our front yard. I say tree because it is larger than some semi-dwarf fruit trees. In late May and early June its covered with lavender pink blossoms and it is alive with bumble bees. With all of the bumble bees working the blossoms the plant is much louder than my little apiary of 10 honeybee hives. That buzz is already going strong when I go outside at 6:00 a.m. and continues past dusk. Bumble bees certainly can't be accused of working banker's hours. I've often watched the bumble bees working the blossoms, but I have only noticed a honeybee on the rhododendron once. I'm assuming the structure of the flower or the nectaries is probably such that the honeybees have difficulty working the blossoms.
It looks like our himalaya blackberries are getting close to blooming. That is probably a consequence of our relatively warm weather in May. I think we had close to ten seventy degree days scattered throughout the month. I've lived in Snohomish since 1993 and I can't recall ever having seen that much warm weather in May. I pay very close attention to the 70 degree mark as that is the magic point at which it is warm enough for queens to take mating flights. Now that we're into June the weather patterns seem to be more normal. Normal spring weather for us consists of highs in the mid to low sixties with a fair amount of rain showers, chance of showers, and chance of rain. Now I'm concerned that the blackberries will bloom several weeks before the weather will be warm enough for a good nectar flow. Himalaya blackberries seem to be very temperature sensitive where nectar production is concerned. At seventy and sunny they produce nectar profusely, At lower temperatures they seem to be a non-event for the bees.
 |
| Himalaya Blackberries on the verge of the bloom |
 |
| Evergreen Blackberry with its deeply cut leaves. Note the Himalaya blackberry leaves in the center of the photo. |
Tuesday, May 29, 2012
Wild Cucumber
As a beekeeper it is hard to avoid becoming an amateur botanist. I can't help but take an interest in any new plant that the girls find interesting. I learned a new one the other day as my friend Quentin and I saw honeybees working small white blossoms on an unknown climbing vine. Friendly bystanders identified the plant as a wild cucumber. I had not noticed this plant near my house, but there appeared to be a lot of it growing in Quentin's neighborhood.
When I got home I quickly consulted my copy of Honey Plants of North America by John H. Lovell. I found two short paragraphs on page 234 and a black and white photograph on page 235. I learned its scientific name is Echinocystis lobata and that it grows wild along rivers from New England to Texas. The black and white photo was sufficient for me to be confident that I had the right plant. This in spite of the fact that the book failed to mention wild cucumber's presence in the Pacific Northwest. Wild cucumber is reported to yield a light amber honey of good quality in the bottom lands of the Mississippi and Missouri rivers. This would explain wild cucumber's presence in Quentin's neighborhood as he lives near a river while I do not.
This book is an excellent resource for the serious beekeeper, who just has to identify any plants his bees are working. The only serious shortcomings in the book's usefulness are the fact that it was published in 1926 and the lack of good quality color photographs. The book has since been republished, but not updated. The book is divided into two sections. In the first section, honey plants are listed alphabetically. The second section of the book has an overview for each of the lower 48 states. Actually, at the time the book was originally published, Alaska and Hawaii were still territories. At the present time the Himalaya Blackberry is the most significant honey plant in Western Washington. This is a non-native invasive species which escaped into the wild from Luther Burbank's plant breeding program. In Lovell's book there is no mention of the Himalaya Blackberry in the plant section and no mention of any blackberries as a significant nectar source in Western Washington. That is because in 1926 there were no Himalaya Blackberries in Western Washington. There is also no mention of Japanese Knotweed, but I assume in 1926 it had either not yet been imported or not yet escaped to the wild. The book does mention Fireweed, the native Oregon Maple (Big Leaf Maple) and Vine Maple as significant honey plants in Western Washington.
 |
| Note the cucumber-like fruit forming in the upper center of the photo |
 |
| I believe this to be wild cucumber |
When I got home I quickly consulted my copy of Honey Plants of North America by John H. Lovell. I found two short paragraphs on page 234 and a black and white photograph on page 235. I learned its scientific name is Echinocystis lobata and that it grows wild along rivers from New England to Texas. The black and white photo was sufficient for me to be confident that I had the right plant. This in spite of the fact that the book failed to mention wild cucumber's presence in the Pacific Northwest. Wild cucumber is reported to yield a light amber honey of good quality in the bottom lands of the Mississippi and Missouri rivers. This would explain wild cucumber's presence in Quentin's neighborhood as he lives near a river while I do not.
This book is an excellent resource for the serious beekeeper, who just has to identify any plants his bees are working. The only serious shortcomings in the book's usefulness are the fact that it was published in 1926 and the lack of good quality color photographs. The book has since been republished, but not updated. The book is divided into two sections. In the first section, honey plants are listed alphabetically. The second section of the book has an overview for each of the lower 48 states. Actually, at the time the book was originally published, Alaska and Hawaii were still territories. At the present time the Himalaya Blackberry is the most significant honey plant in Western Washington. This is a non-native invasive species which escaped into the wild from Luther Burbank's plant breeding program. In Lovell's book there is no mention of the Himalaya Blackberry in the plant section and no mention of any blackberries as a significant nectar source in Western Washington. That is because in 1926 there were no Himalaya Blackberries in Western Washington. There is also no mention of Japanese Knotweed, but I assume in 1926 it had either not yet been imported or not yet escaped to the wild. The book does mention Fireweed, the native Oregon Maple (Big Leaf Maple) and Vine Maple as significant honey plants in Western Washington.
Subscribe to:
Posts (Atom)